How to Adjust E-Bike Brakes: Complete Maintenance Guide for Disc and Rim Brakes
FTC Disclosure: This article contains affiliate links. If you purchase through our links, we may earn a commission at no additional cost to you. This helps us continue providing expert e-bike guidance. Your e-bike's bra
FTC Disclosure: This article contains affiliate links. If you purchase through our links, we may earn a commission at no additional cost to you. This helps us continue providing expert e-bike guidance.
Your e-bike's brakes are its most critical safety component. Whether you're commuting through city traffic or descending mountain trails, properly adjusted brakes can mean the difference between a controlled stop and an emergency situation. Most e-bike riders will need to adjust their brakes within the first 500 miles of ownership as cables stretch and pads wear in.
Free: Ultimate eBike Buying Guide
Avoid the 4 most expensive eBike mistakes
This comprehensive guide covers everything you need to adjust ebike brakes yourself, saving $40-80 on shop visits. We'll walk through disc brake alignment, cable tension adjustments, and pad replacement for both hydraulic and mechanical systems. You'll also learn when DIY maintenance makes sense and when professional service is warranted.
Before we dive into the technical details, proper brake maintenance extends pad life by 30-40% and prevents costly rotor damage. Let's ensure your e-bike stops safely every time.
Free Download
Ultimate eBike Buying Guide
Avoid the 4 most expensive eBike mistakes
Instant download. No spam. Unsubscribe anytime.
Key Takeaways
- Brake adjustment should be performed every 200-300 miles or when you notice reduced stopping power
- Most e-bike brake issues (squealing, rubbing, weak response) can be fixed with basic tools in under 30 minutes
- Disc brakes require caliper alignment and pad clearance of 0.2-0.4mm from the rotor
- Cable-actuated brakes need periodic cable tension adjustment as cables stretch during break-in
- Hydraulic brakes may need bleeding every 12-18 months to maintain optimal performance
- Always test brakes in a safe area before riding after any adjustment
What Are the Signs Your E-Bike Brakes Need Adjustment?
Your e-bike brakes need adjustment when you experience squealing sounds, reduced stopping power, or brake lever travel exceeding 1 inch before engagement. Other indicators include brake pad rubbing against rotors, uneven pad wear, or brake levers that pull all the way to the handlebar grips.
E-bikes are heavier than traditional bikes (typically 50-70 lbs) and travel at higher speeds, putting extra stress on braking systems. This accelerated wear means more frequent adjustments compared to regular bicycles.
Watch for these specific warning signs:
Mechanical Disc Brakes:
- Squealing or grinding noises during braking
- Brake lever pulls closer to handlebar than normal
- Inconsistent braking force (grabby or weak)
- Visible pad wear below 1.5mm thickness
Hydraulic Disc Brakes:
- Spongy or soft lever feel
- Brake lever travels further than usual
- Reduced stopping power despite good pad condition
- Fluid leaking from calipers or brake lines
Rim Brakes (less common on e-bikes):
- Uneven pad contact with rim
- Brake pads contacting tire instead of rim
- Excessive lever travel
- Worn brake track on wheel rim
Brake pads should be replaced when they reach 0.5mm thickness. Most riders will need adjustment 2-3 times before pad replacement becomes necessary.
How Do Disc Brakes Work on Electric Bikes?
Disc brakes on electric bikes use calipers that squeeze brake pads against a metal rotor attached to the wheel hub, creating friction that slows the bike. When you pull the brake lever, either a cable (mechanical) or hydraulic fluid (hydraulic) transfers force to the caliper, pressing pads against both sides of the rotor simultaneously.
E-bikes typically use 160mm-203mm diameter rotors. Larger rotors (180mm+) are recommended for e-bikes due to their additional weight and speed. The increased surface area provides 15-20% more stopping power and better heat dissipation during prolonged braking.
There are two main disc brake types:
Mechanical Disc Brakes:
- Use a cable to actuate the caliper
- Easier to adjust and maintain
- Common on budget to mid-range e-bikes like Heybike models
- Require more frequent adjustment as cables stretch
Hydraulic Disc Brakes:
- Use sealed fluid lines for power transfer
- Provide superior modulation and stopping power
- Standard on premium e-bikes like Velotric and Ride1Up models
- Need less frequent adjustment but require specialized bleeding tools
Most brake issues stem from three problems: rotor misalignment, incorrect pad clearance, or contaminated pads. Understanding your brake type helps determine the right adjustment approach.
What Tools Do You Need to Adjust E-Bike Brakes?
You need a set of hex wrenches (4mm and 5mm most common), a cable cutter for mechanical brakes, and a rotor truing tool or adjustable wrench to adjust ebike brakes. Optional but helpful tools include a brake pad spreader, isopropyl alcohol for cleaning, and a torque wrench for proper bolt tightening.
Most e-bike brake adjustments require minimal investment. Here's your essential toolkit:
Basic Tool Kit ($30-50):
- Hex wrench set (2mm-8mm)
- T25 Torx wrench (for some rotor bolts)
- Cable cutters (mechanical brakes only)
- Clean rag and isopropyl alcohol
- Flashlight or headlamp
Advanced Tool Kit ($80-150):
- Topeak Mini 20 Pro Multi-Tool (covers most adjustments on the go)
- Rotor truing fork
- Brake pad spreader
- Torque wrench (2-10 Nm range)
- Hydraulic brake bleed kit (for hydraulic systems)
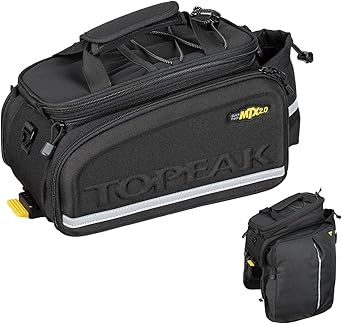
The Topeak Mini 20 Pro is particularly valuable because it includes most hex sizes, a chain tool, and spoke wrenches in a compact package. Keep one in your Topeak MTX TrunkBag for trailside repairs.
Avoid using automotive brake cleaner on e-bike brakes. Use only isopropyl alcohol (90%+ concentration) or specific bike disc brake cleaner to prevent pad contamination.
How Do You Adjust Mechanical Disc Brakes on an E-Bike?
To adjust mechanical disc brakes, first loosen the caliper mounting bolts, squeeze the brake lever to center the caliper on the rotor, then tighten the bolts while holding the lever. Next, adjust the cable tension using the barrel adjuster until you achieve proper lever feel with 0.2-0.4mm pad clearance on each side.
This process aligns the caliper and ensures even pad contact. Follow these detailed steps:
Step 1: Check Rotor Alignment Spin the wheel and watch the rotor pass through the caliper. If it wobbles or rubs, you'll need to true the rotor first using a rotor truing tool. Minor wobbles under 0.5mm are acceptable.
Step 2: Loosen Caliper Bolts Using a 5mm hex wrench, loosen (but don't remove) the two caliper mounting bolts. The caliper should move freely.
Step 3: Center the Caliper Squeeze the brake lever firmly and hold it. While holding, tighten the mounting bolts to manufacturer specs (typically 6-8 Nm). This centers the caliper on the rotor.
Step 4: Adjust Inner Pad Most mechanical calipers have a red adjustment dial on the inboard side. Turn it clockwise until you hear light rubbing, then back it off 1/4 turn.
Step 5: Adjust Cable Tension Use the barrel adjuster (located where the cable enters the caliper) to fine-tune lever feel. Turn counter-clockwise to increase tension and reduce lever travel. Proper adjustment means the brake engages after 1/2 to 3/4 inch of lever travel.
Step 6: Test and Fine-Tune Test the brake while stationary, then during a slow roll. Make micro-adjustments until you achieve smooth, consistent braking with no rubbing.
This process takes 10-15 minutes per brake once you're familiar with it. Cables stretch most during the first 100 miles, so expect to readjust within your first few weeks of riding.
How Do You Adjust Hydraulic Disc Brakes?
Hydraulic disc brake adjustment focuses on caliper alignment rather than cable tension, since fluid pressure is self-adjusting. Loosen the caliper bolts, squeeze the brake lever to center the caliper, tighten the bolts, then check for rotor rub. If the lever feels spongy or travels too far, the system needs bleeding.
Hydraulic brakes require less frequent adjustment than mechanical systems. Here's the process:
Standard Alignment Procedure:
-
Inspect the System - Check for fluid leaks at calipers and brake lever. Even small leaks compromise braking performance.
-
Loosen Caliper Mounting Bolts - Use a 5mm hex wrench to loosen both bolts 2-3 turns. The caliper should move freely.
-
Center the Caliper - Pull the brake lever firmly and hold it (or use a zip tie or rubber band to keep it engaged). While holding pressure, tighten both mounting bolts evenly to 6-8 Nm.
-
Check Pad Clearance - Spin the wheel. You should have equal clearance (0.2-0.4mm) on both sides. Shine a light through the caliper to verify.
-
Fine-Tune Alignment - If slight rubbing persists, slightly loosen one bolt, nudge the caliper, and retighten. Small adjustments make big differences.
When to Bleed Hydraulic Brakes:
- Lever pulls more than 3/4 inch before engagement
- Spongy or inconsistent lever feel
- Visible air bubbles in brake line (if clear)
- After 12-18 months regardless of symptoms
Bleeding hydraulic brakes requires a specialized kit ($30-60) specific to your brake brand (Shimano, SRAM, Tektro, etc.). This advanced procedure is best left to bike shops unless you're mechanically inclined.
Most Velotric and Ride1Up e-bikes use Tektro hydraulic brakes, which are reliable but may need earlier bleeding compared to Shimano systems.
What Causes Brake Squealing and How Do You Fix It?
Brake squealing is caused by contaminated brake pads, glazed pad surfaces, or improper bedding-in of new pads. Fix it by cleaning the rotor with isopropyl alcohol, lightly sanding glazed pads with fine sandpaper, and performing proper bed-in procedures with 20-30 gradual stops from moderate speed.
Squealing brakes are annoying but don't always indicate a safety issue. Here's how to diagnose and fix the problem:
Common Causes:
- Contamination - Oil, chain lube, or brake cleaner on rotors or pads
- Glazing - Overheated pads develop a hard, smooth surface
- Poor Bedding - New pads not properly broken in
- Cheap Pads - Low-quality organic pads squeal more frequently
- Misalignment - Uneven pad contact creates vibration
Fix Protocol:
For Contamination:
- Remove wheels and inspect rotors for oil residue
- Clean rotors with isopropyl alcohol (90%+) and a clean rag
- Remove brake pads and inspect for oil saturation
- Replace pads if contaminated (cleaning rarely works)
- Identify contamination source and prevent recurrence
For Glazed Pads:
- Remove brake pads from caliper
- Use 100-grit sandpaper to lightly scuff the pad surface
- Remove the glazed layer until you see fresh pad material
- Clean pads and rotors thoroughly before reinstalling
- Bed in the pads properly with gradual stops
Proper Bed-In Procedure:
- Find a safe area with room to brake repeatedly
- Accelerate to 15 mph
- Apply moderate braking force (not full stop)
- Slow to 5 mph, then release and repeat
- Perform 20-30 repetitions
- Allow brakes to cool for 10 minutes
- Test with harder stops
This process transfers an even layer of pad material onto the rotor, ensuring quiet, consistent braking. Skipping bed-in is the most common cause of persistent squealing on new pads.
How Often Should You Replace E-Bike Brake Pads?
Replace e-bike brake pads when they reach 1.5mm thickness or sooner if you notice reduced braking performance. Most e-bike riders need replacement every 500-1,500 miles depending on terrain, riding style, and brake type. Hydraulic disc brake pads typically last 30-40% longer than mechanical due to more even wear.
Brake pad lifespan varies significantly based on usage:
Average Replacement Intervals:
- Urban commuting: 1,200-1,800 miles
- Hilly terrain: 600-1,000 miles
- Mountain trails: 400-800 miles
- Cargo hauling: 500-1,200 miles
E-bikes wear brake pads faster than traditional bikes due to their additional weight and higher speeds. A Yuba cargo bike loaded with 100 lbs of cargo will consume pads twice as fast as an unloaded commuter e-bike.
Inspection Process:
-
Visual Check - Remove wheel and look through caliper. Pads should be at least 1.5mm thick.
-
Compound Check - Organic (resin) pads are quieter but wear faster. Metallic (sintered) pads last longer but may squeal more.
-
Uneven Wear - If one pad is significantly thinner, your caliper alignment needs adjustment.
-
Rotor Condition - Check rotor thickness (should be 1.5mm+ for most e-bikes). Worn rotors accelerate pad wear.
Replacement Tips:
- Always replace both pads in a caliper simultaneously
- Consider upgrading to metallic pads for longer life
- Clean rotors thoroughly when installing new pads
- Properly bed in new pads before aggressive riding
- Keep spare pads in your Topeak MTX TrunkBag
Budget $15-35 per brake for quality replacement pads. Buying multiple sets from retailers like Ride1Up often includes free shipping and bulk discounts.
How Do You Adjust Brake Lever Reach and Position?
Adjust brake lever reach using the reach adjustment screw (usually a small hex bolt near the lever pivot) to move the lever closer or farther from the handlebar. Proper reach allows you to apply full braking force with your index and middle fingers while maintaining comfortable hand position. Adjust lever angle by loosening the brake clamp and rotating to match your natural wrist angle.
Proper lever setup prevents hand fatigue and ensures maximum braking control. Here's how to optimize your setup:
Reach Adjustment:
-
Locate the Adjuster - Most hydraulic brakes have a small hex bolt (2mm-3mm) at the lever body. Mechanical brakes may lack this feature.
-
Test Current Position - With one finger on the lever, you should achieve full brake engagement before the lever touches your remaining fingers.
-
Adjust Distance - Turn the reach adjustment screw clockwise to move the lever closer to the handlebar. Turn counter-clockwise to increase distance.
-
Optimal Setting - Your index and middle fingers should comfortably engage the brake with slight hand angle bend (155-165 degrees).
Lever Angle Adjustment:
-
Loosen Brake Clamp - Use a 4mm or 5mm hex wrench to loosen the handlebar clamp bolt.
-
Position the Lever - Your wrist should remain straight when braking. Angle the lever so a straight line extends from your forearm through your hand to the lever.
-
Standard Angles - Most riders prefer 35-45 degrees downward angle from horizontal.
-
Tighten Securely - Torque to manufacturer specs (typically 5-6 Nm). Over-tightening can crack the clamp.
Symmetry Matters: Set both brake levers identically. Inconsistent lever positions cause muscle memory confusion during panic stops. Take a photo of one lever's position to replicate on the other side.
Riders with smaller hands benefit from maximum reach adjustment and one-finger brake levers. If your e-bike came with two-finger levers, upgrading to adjustable one-finger levers (available from brake manufacturers) improves control significantly.
What Safety Checks Should You Perform After Brake Adjustment?
After brake adjustment, perform a stationary squeeze test to verify firm lever feel, spin both wheels to check for rotor rub, test brakes during a slow roll in a safe area, and perform emergency stops from 15 mph to confirm full stopping power. Check that brake pads contact the rotor evenly and that no cables interfere with wheel or frame.
Never ride into traffic after brake work without thorough testing. Follow this safety protocol:
Pre-Ride Checklist:
-
Lever Feel Test - Squeeze each brake lever firmly. It should feel solid with no sponginess. If hydraulic brakes feel soft, they need bleeding.
-
Rotor Clearance - Spin each wheel and watch the rotor pass through the caliper. No rubbing should occur. Light scraping sounds may indicate misalignment.
-
Cable Security (mechanical only) - Check that cable pinch bolts are tight and no cable strands are frayed near attachment points.
-
Pad Contact - Squeeze the lever and observe pad contact through the caliper. Both pads should contact the rotor simultaneously.
-
Mounting Bolt Torque - Verify all caliper and lever mounting bolts are properly tightened. Loose bolts can cause brake failure.
Test Ride Protocol:
-
Slow Roll Test - Roll at walking speed and apply each brake individually. The bike should stop smoothly without pulling to one side.
-
Moderate Speed Test - Ride at 10-12 mph on level ground. Test both brakes individually, then together. Listen for unusual sounds.
-
Emergency Stop Test - From 15 mph, perform a hard stop with both brakes. The bike should stop quickly without wheel lockup (unless you have no ABS).
-
Hill Test - If available, test brakes on a gentle downhill. Extended braking reveals issues that short stops may miss.
-
Heat Check - After several stops, carefully touch the brake caliper (not rotor). Excessive heat indicates dragging or contamination.
Red Flags That Require Immediate Attention:
- Levers pull to handlebar without resistance
- One brake significantly weaker than the other
- Grinding or scraping sounds during braking
- Wheel lockup during moderate braking
- Visible fluid leaks on hydraulic systems
If you encounter any red flags, don't ride the e-bike. Either readjust the brakes or consult a professional mechanic. Brake failure on a 60 lb e-bike traveling 28 mph can cause serious injury.
Consider adding a Garmin Varia RTL515 Radar Tail Light to your safety setup. While it won't improve your brakes, it alerts you to approaching vehicles, giving you more time to brake safely.
How Do You Maintain E-Bike Brakes Between Adjustments?
Maintain ebike brake performance between adjustments by cleaning rotors monthly with isopropyl alcohol, inspecting pads for wear every 200 miles, avoiding brake contamination from chain lube, and storing the bike in a dry location. Never spray bike cleaner directly on brake components, and protect the bike during transport to prevent rotor damage.
Preventive maintenance extends brake component life by 40-50% and reduces adjustment frequency. Follow these practices:
Monthly Maintenance (10 minutes):
-
Visual Inspection - Check brake pads for wear, cracks, or contamination. Look for fluid leaks on hydraulic systems.
-
Rotor Cleaning - Remove wheels and clean rotors with isopropyl alcohol and a clean rag. This removes accumulated dust and light contamination.
-
Cable Check (mechanical only) - Inspect cables for fraying, rust, or kinks. Apply a drop of cable lubricant if cables feel sticky.
-
Bolt Torque - Check that all mounting bolts remain tight. Vibration can gradually loosen hardware.
After Wet Rides:
Moisture affects brake performance temporarily. After riding in rain:
- Perform several moderate stops to dry pads and rotors
- Wipe visible water from brake calipers
- Allow the bike to dry thoroughly before storage
- Consider upgrading to sintered (metallic) pads if you ride frequently in wet conditions
Chain Lube Precautions:
Chain lubricant is the most common brake contamination source. When lubing your chain:
- Place cardboard behind the chain to catch overspray
- Use a precision applicator, not spray bottles
- Wipe excess lube immediately
- Keep lube away from rear wheel and brake rotor
- Allow lube to dry before riding
Transport Protection:
Rotors are easily bent during transport:
- Use rotor spacers when removing wheels
- Install wheel blocks to prevent wheel movement
- Consider a padded bike bag if transporting in a vehicle
- Mount Quad Lock Phone Mounts away from brake levers to prevent accidental engagement
Storage Best Practices:
- Store bikes in a climate-controlled area when possible
- Hang bikes to reduce pressure on brake pads
- Cover bikes if storing in a dusty garage
- Periodically squeeze brake levers during long-term storage to prevent piston seizure
Riders who use their e-bikes for cargo hauling with Yuba cargo bikes should inspect brakes more frequently, as the additional weight accelerates wear. Consider upgrading to larger rotors (180mm or 203mm) if you regularly carry heavy loads.
When Should You Take Your E-Bike to a Professional?
Take your e-bike to a professional mechanic when hydraulic brakes need bleeding, rotors require replacement, brake mounting threads are stripped, or you lack confidence in your adjustment results. Professional service is also recommended after crashes that may have damaged brake components or when brake issues persist after multiple DIY adjustment attempts.
Some brake tasks require specialized knowledge and tools. Here's when to seek professional help:
Definitely See a Professional:
- Hydraulic brake bleeding (unless you have brand-specific tools and experience)
- Rotor replacement requiring exact torque specifications
- Cracked or damaged brake calipers
- Stripped mounting threads on frame or fork
- Internal brake cable routing on carbon frames
- Brake system upgrades or conversions
Consider Professional Service:
- First-time brake adjustment if you're not mechanically inclined
- Persistent brake issues after following adjustment guides
- Pre-purchase inspection on used e-bikes
- Annual full service including brake system inspection
- After crashes involving brake components
Professional Service Costs:
- Basic brake adjustment: $20-40 per brake
- Hydraulic brake bleed: $35-60 per brake
- Brake pad replacement: $30-50 per brake (including labor)
- Full brake system overhaul: $100-180
Many e-bike brands offer free first-year adjustments with new bike purchases. Check if your Ride1Up, Velotric, or Engwe e-bike includes this benefit before paying for service.
Finding a Qualified Mechanic: Not all bike shops have e-bike expertise. Look for:
- Shops with e-bike certification programs
- Mechanics familiar with your specific brake brand
- Shops that service e-bikes regularly (not just traditional bikes)
- Positive reviews from other e-bike owners
Ask the shop about turnaround time. Brake adjustments should typically be completed same-day or next-day unless parts are needed.
FAQ: Common E-Bike Brake Questions
How tight should e-bike brake cables be?
E-bike brake cables should be tight enough that the brake lever travels 1/2 to 3/4 inch before engaging, with no slack in the cable housing. Over-tightening causes premature pad wear and rotor rubbing, while under-tightening results in excessive lever travel and reduced stopping power.
Can I use automotive brake cleaner on e-bike disc brakes?
Never use automotive brake cleaner on e-bike brakes. Automotive cleaners leave oily residues that contaminate brake pads and reduce stopping power by 40-60%. Use only isopropyl alcohol (90%+ concentration) or bicycle-specific disc brake cleaner to safely clean rotors and calipers.
Why do my e-bike brakes feel spongy?
Spongy brake feel indicates air in hydraulic brake lines, worn brake pads creating excessive lever travel, or stretched cables on mechanical systems. For hydraulic brakes, bleeding removes air bubbles and restores firm lever feel. For mechanical brakes, adjusting cable tension or replacing worn pads typically solves sponginess.
How do I stop my e-bike brake rotors from rubbing?
Stop brake rotor rubbing by loosening the caliper mounting bolts, squeezing the brake lever to center the caliper, and tightening the bolts while holding the lever. If rubbing persists, check rotor straightness with a rotor truing tool and adjust caliper pad clearance to 0.2-0.4mm on each side.
What's the difference between organic and metallic brake pads?
Organic (resin) brake pads are quieter, provide better modulation, and cost less, but wear 30-40% faster than metallic pads. Metallic (sintered) brake pads last longer, perform better in wet conditions, and handle heat better, making them ideal for heavy e-bikes, cargo bikes, and mountain riding despite occasional squealing.
Conclusion: Master E-Bike Brake Maintenance for Safer Rides
Proper brake adjustment is the most important maintenance skill every e-bike owner should master. With basic tools and 30 minutes of practice, you can maintain optimal stopping power, extend component life, and save hundreds of dollars in shop fees over your e-bike's lifetime.
Remember the key principles: keep brakes clean, adjust regularly, inspect for wear, and don't hesitate to seek professional help for complex issues like hydraulic bleeding. Whether you ride a budget-friendly Heybike for daily commutes or haul cargo with a Yuba bike, properly maintained brakes are your most critical safety feature.
Start with a thorough inspection today. Check your brake pad thickness, clean your rotors, and test your brake adjustment. Your next ride will be safer and more confident with brakes you can trust.
Need other essential e-bike accessories? Check out our guide to E-Bike Accessories for recommendations on locks, lights, and cargo solutions. Don't forget a quality Kryptonite lock to protect your investment when you're not riding.
Ready to enhance your e-bike safety? Start with proper brake maintenance, then add visibility with the Garmin Varia RTL515 radar tail light and security with ABUS locks. Your complete safety system starts with brakes you can trust.
Affiliate Disclosure
Discussion
Sign in with GitHub to leave a comment. Your replies are stored on this site's public discussion board.
Continue Reading

Topeak Ratchet Rocket Lite NTX+ Review: The Multitool With Real Torque Control
April 17, 2026

YS YOSE POWER 48V 15Ah Seat-Tube Battery Review: Non-Hailong Frame Option
April 17, 2026

LGECOLFP 48V 15Ah E-Bike Battery Review: +50% Range for $189
April 17, 2026

VEVOR 1000W Electric Bike Conversion Kit Review: DIY E-Bike Under $220
April 17, 2026